
As a veteran bass pro and lure designer, Benedict knows plenty about rigging soft-plastics. And the Forney, Texas, pro contends that even the most experienced anglers make mistakes when it comes to rigging them.
“The proper rigging of soft plastics is essential to make them work right,” Benedict says. “We design these lures to be fished in a certain manner, but soft-plastics have to be rigged right so the fisherman can get the maximum action from each lure.
“I think the average to experienced angler is uneducated about how a specific piece of plastic is supposed to be rigged right. I see it with other pros and in pictures of soft plastics in fishing magazines all the time. There are several wrong ways to rig them and really only one right way to rig them ‹ depending on what style of soft plastic it is. Improperly rigging soft plastics hurts the action of the lure and promotes line twist.”
The most common mistakes occur with the hook size and placement, according to Benedict. Overloading a soft-plastic lure with the wrong-sized hook or improperly rigging it can completely kill the action of the bait. Many anglers are only partially guilty of this, but unknowingly limit the natural movement of the flexible plastic.
The most overlooked aspect of rigging soft plastics has to be the role of the mold mark. “Every piece of soft plastic on the market has a mold mark somewhere,” Benedict explains. “That is where the two halves of the mold come together. There will be a seam on two different sides of every piece of soft plastic, with the exception of tube lures, which are made in a totally different manner.
“How you rig a soft-plastic lure in regards to that mold mark makes all the difference in the world. Taking that seam into consideration allows that lure to do what it was designed to do, give off the maximum action and attract bass.”
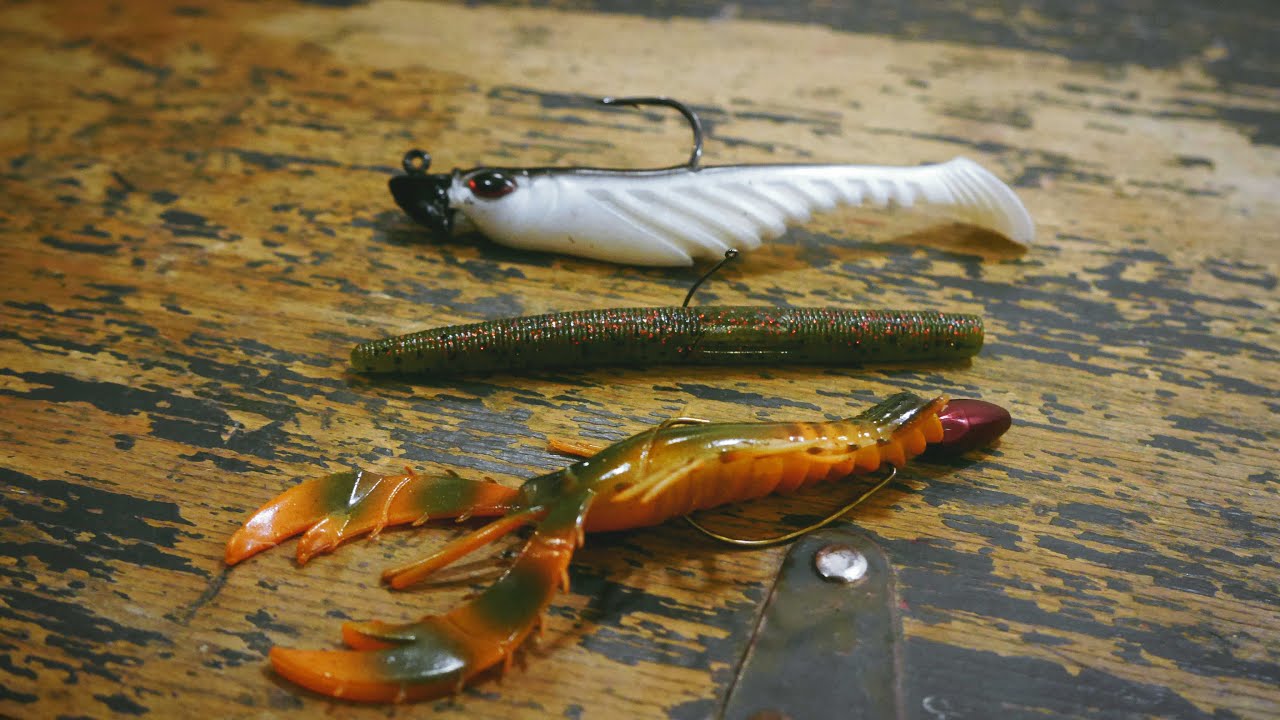
Benedict and other seasoned pros provide a detailed look at the proper method for rigging each specific type of soft-plastic lure. Floating worm, Zoom’s Trick Worm and Jawtec’s Rippin’ Rattler require precise rigging. Most experienced fishermen rig a floating-style worm on a 12- to 18-inch leader connected to the main line with a swivel, which reduces line twist. Many pros prefer to use a 2/0 offset or wide-gap hook for this type of worm.
When rigged properly, the hook should ride between the mold seams of the plastic. And when completed, the worm should have a slight bend or crook (which gives it more action when twitched subtly). Here are step-by-step rigging instructions: 1.) Enter the hook at the nose of the bait; 2.) Exit the hook about 3/8-inch down; 3.) Bring the hook completely out; 4.) Slide the worm up to cover the hook eye and knot (making it more weedless); 5.) Rotate the hook to get it in position to go back into the body of the worm; 6.) Pinch the worm up slightly and embed the hook point at a 45-degree angle (instead of the more traditional 90-degree angle); 7.) Push the hook point completely through the lure and leave it exposed for fishing open water or embed it just beneath the top side of plastic to make it weedless. “It is important not to bring the hook out along either of the mold marks,” Benedict adds. “If the hook is perpendicular to the seams, the worm has a better action and responds easier to each twitch of the rod.”
Many fishermen don’t rig soft-plastic jerkbaits properly and deprive themselves of the erratic, tantalizing action inherent in these lures. Most anglers make the mistake of rigging it so that the bait is crooked. The hook has to be perfectly straight in the bait for it to work right. That is what gives the bait that perfect keel effect as it comes through the water. Here’s how to properly rig a soft jerkbait: 1.) Insert a 4/0 or 5/0 wide-gap or offset hook directly into the middle of the nose of the lure; 2.) After penetrating about a 1/2-inch of plastic, bring the hook out (leaving the eye in the plastic) of the bottom (rounded side) of the lure; 3.) Then rotate the hook to be in position to re-enter the bait; 4.) Bend the bait slightly to enable the hook point to re-enter the center of the bottom of the jerkbait at a 90-degree angle; 5.) Finally, Push the hook through so that the point rests in the small groove on the top of the jerkbait.
Although they come in all shapes, sizes and names, most of the plastic worms used for flipping/pitching have common characteristics that include a short design, bulky or large diameter body and a stout C-shaped tail. That shape is best suited for getting the best penetration and maximum vibration in heavy-cover situations.
“The biggest consideration with rigging this kind of worm is to position the hook so that the worm’s short, curl tail is in the down position as it swims through the water,” Benedict says. “With the tail in the down position, it is going to grab the water as it comes through the water and it is going to flex faster, which will cause the most vibration in the water. Rig it on the wrong seam and the round, outside edge of the tail will try to catch the water, but it doesn’t catch water nearly as well as the inside edge of the curl.”
Making the worm ride tail down in the water simply involves rigging the hook on the mold mark that is in line with the inside curl of the tail. Here’s a step-by-step look at rigging a heavy-cover worm: 1.) Enter through the nose of the worm and exit the hook directly on the proper seam about 3/8 of an inch down; 2.) Slide the worm up to cover the knot and make it more weedless; 3.) Rotate the hook and pinch the worm slightly to re-enter the worm; 4.) Slide the hook completely through the body of the worm at a 45-degree angle; 5.) Tuck the hook point back into the top of the worm (making it weedless but with little plastic to penetrate on the hook set). Next month, we will examine the right way to rig tubes, crawfish, lizards, finesse worms and grubs.